We guide you through selecting a compatible motorcycle lithium battery, preparing a safe workspace, and executing a precise install that preserves OEM charging interfaces and bike geometry. We’ll cover proper removal, clean connections, secure mounting, and correct torque, followed by careful charging and ECU considerations to protect your system. Our approach is methodical and technical, aiming to minimize vibration and electrical issues. If you want reliable performance, we’ll show you where the risks lie and how to avoid them.
Key Takeaways
- Assess battery chemistry, capacity, and peak current to meet cold-cranking, reserve, and runtime needs while fitting OEM charging and mounting geometry.
- Prepare a safe workspace, use insulating surfaces, PPE, and proper cord routing to support risk-free lithium work.
- Remove the old battery with power isolated, clean terminals, organized fasteners, and proper disposal labeling.
- Install the new battery with correct polarity, clean posts, secure mounting, proper cable routing, and torque-per-spec alignment.
- Charge and condition per manufacturer guidelines, document cycle data, monitor temperature, and inspect seals, wiring, and hardware regularly.
Identify the Right Motorcycle Lithium Battery: Criteria, Trade-Offs, and Bike Needs
So, how do we choose the right motorcycle lithium battery? We approach identification systematically, matching bike needs to battery specs. We begin with choosing capacity, ensuring the pack delivers sufficient cold-cranking amps, reserve capacity, and runtime for our motorcycle’s electrical load. We balance peak current against longevity, seeking cells with stable discharge profiles under vibration and temperature. We assess compatibility with the OEM charging system, including BMS communication, connector types, and mounting geometry. Weight considerations matter; weight implications affect handling, center of gravity, and suspension behavior, so we quantify auto- and rider-perceived changes. We document life-cycle expectations, warranty terms, and failure modes. Finally, we select candidates that satisfy the bike’s electrical demand, space constraints, and maintenance preferences.
Prep Your Tools, Gear, and Workspace for Safe Lithium Work
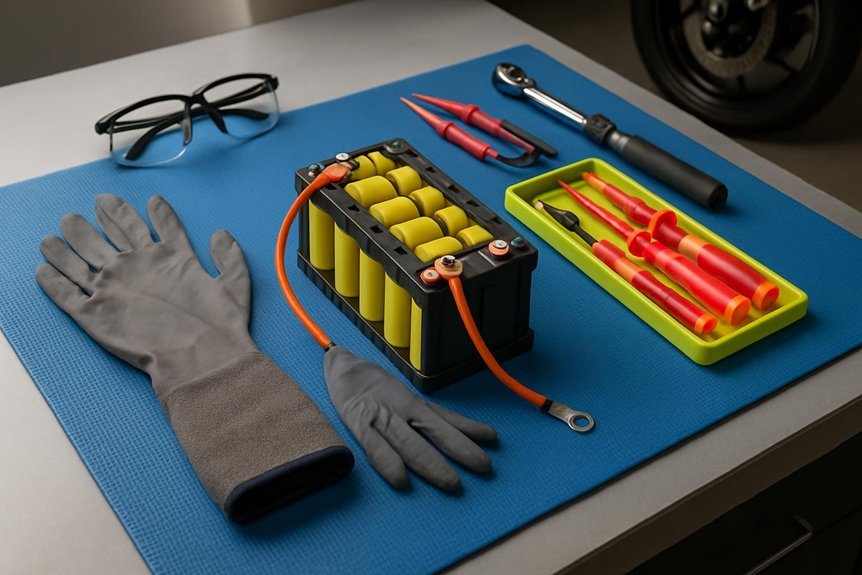
We start by assembling a dedicated, non conductible work surface, insulating mat, and a clear, well-lit area to prevent short circuits and misplacements. We then organize tools with precise placement to support efficient workflow. Our approach emphasizes battery chemistry awareness, ensuring we match connectors, terminals, and adapters to the chosen cells, cables, and security features. We confirm safety protocols, including eye protection, gloves, and vented storage for any solvents or cleaners used nearby. Our electrician skills guide cord routing, grounding, and torque checks on fasteners, avoiding overtightening. We assess tool ergonomics to minimize fatigue during sequence tasks, selecting length, grip, and weight suited to the operator. Finally, we establish a plan, labeling zones for measurement, testing, and inspection, reducing risk during handling and installation.
Remove the Old Battery Safely: Isolation, Disposal, and Bike Prep

To begin removing the old battery safely, we isolate the system, confirm the bike is powered down, and secure it from unintended movement. We follow formal isolation procedures, disconnecting negative then positive leads, and verify no residual current remains. Next, we inspect for corrosion, corrosion resistance, and proper terminal cleanliness before handling. We remove fasteners with appropriate tools, keeping hardware organized for reassembly. We place the battery on a nonconductive mat, wearing eye protection and insulated gloves. For disposal methods, we label the unit per local regulations and arrange compliant transport to a licensed facility if non-repairable. If feasible, recycle components such as terminals and case. We document battery status, preserve serial data, and reset any fault indicators after removal. Finally, we prep the bike area for safe installation of the replacement.
Install the New Lithium Battery: Connections, Fit, and Secure Mounting
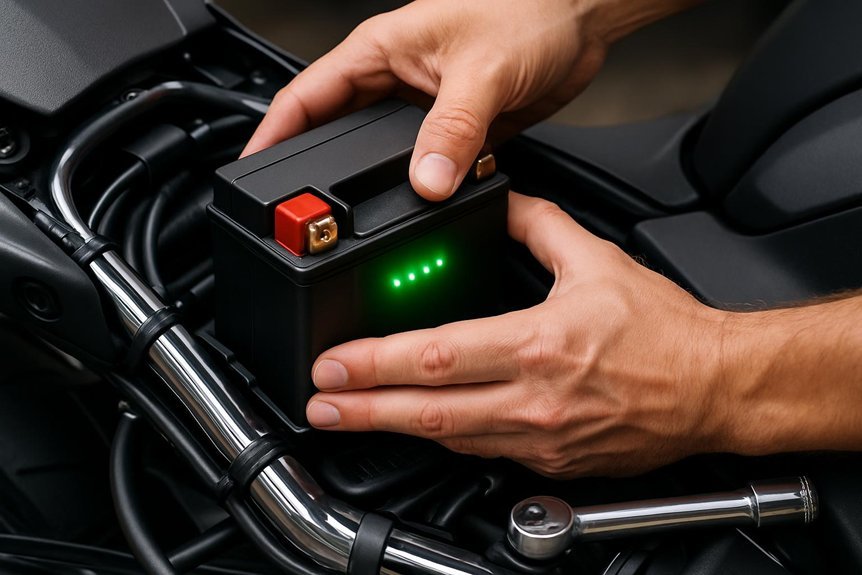
How do we guarantee a clean, secure connection when installing the new lithium battery? We verify polarity, clean posts, and inspect cables for damage before connection. We then attach the battery, ensuring snug engagement with the harness, and tighten fasteners to spec. Next, we verify that the battery sits flat and aligned with mounting surfaces to prevent vibration. Finally, we check clearance around terminals and routing paths to avoid pinching or heat transfer.
- Confirm polarity and post cleanliness before install battery
- Dress cables, secure with appropriate clamps, and avoid sharp bends
- Align battery housing, seat firmly, and tighten mounting hardware to spec
- Recheck terminal protection and cable routing for secure mounting and isolation
Charge, Code, and Break-In: Essential Prep for Your Bike’s ECU and Battery
We’ll outline the essential charge protocols and ECU break-in steps we follow to prepare both the battery and the bike’s control unit. We start with a precise, manufacturer-aligned charging sequence and then apply a controlled ECU initialization to ensure proper mapping and fuel-spark timing. By documenting these steps clearly, we set a reliable foundation for optimal performance and long-term reliability.
Charge Protocols
Questioning when and how you should start charging your lithium battery? We detail precise protocols to protect battery chemistry while preserving ECU compatibility. Our approach avoids overcharging and ensures stable initial conditioning, aligning with best practices for charging limits and lithium battery care. We emphasize controlled, factory-specified methods and monitor voltages during early cycles.
- Verify approved charger and connector, and set charging limits per spec.
- Charge in a stable environment; avoid extreme temperatures, including cold weather charging concerns.
- Initiate a gentle, monitored conditioning cycle before full-rate charging.
- Record voltages, temperatures, and cycle counts to detect deviations early.
Follow these steps to minimize impedance growth, preserve capacity, and prevent ECU alarm triggers. Consistency in procedure supports reliable performance and longevity of the battery system.
ECU Break-In Steps
ECU break-in begins with a controlled, repeatable sequence that syncs the battery’s initial conditioning with the bike’s engine management. We approach this step-by-step: ensure the charger is disconnected after final conditioning, then briefly power the ECU to verify readiness without cranking. Next, perform a cautious idle mapping before any full-throttle operation, allowing fuel and ignition tables to stabilize alongside the lithium pack. During this phase, monitor voltage sag, current draw, and ambient temperature, recording deviations for later diagnosis. We emphasize battery chemistry awareness, avoiding sudden high-current loads that could upset cell balance. Handle electrolyte with care even in sealed packs, following manufacturer guidance. Conclude with a light, progressive ride to complete the break-in, then recheck all parameters and perform a final validation.
Post-Install Safety Checks and System Test Plan
Post-install safety checks are performed before we power the system, verifying electrical integrity, secure mounting, and proper wiring to prevent faults during operation. We proceed with a structured system test to validate each subsystem and confirm overall performance.
Post-install safety checks verify electrical integrity, secure mounting, and proper wiring before powering the system.
- Confirm battery terminals are clean, tight, and free of corrosion; verify polarity and insulation integrity.
- Ground and harness routing are inspected to prevent chafing, shorts, or vibration-induced wear.
- Power the harness progressively, monitor for abnormal draw, fuse integrity, and temperature rise.
- Run functional tests on charging, load disconnection, and alarm indicators, documenting results for post install safety.
Common Pitfalls and Maintenance Essentials for Longevity
After the post-install safety checks, we focus on common pitfalls and maintenance essentials to keep your motorcycle lithium battery reliable over the long term. We start with correct charging practices to prevent overvoltage or undercharge, then monitor cell balance and temperature during operation. Avoid fast-charging unless specified by the manufacturer, and use a compatible charger with proper termination. Inspect terminals for corrosion and securement to prevent voltage drop from vibration. Track battery chemistry consistency through periodic voltage and impedance checks, noting any drift that indicates aging or imbalance. Maintain precise weight distribution and mounting alignment to minimize mechanical strain on terminals and casings. Store the battery away from extreme temperatures, and disconnect during prolonged inactivity to reduce self-discharge and degradation. Regularly replace damaged shims or hardware to preserve seal integrity.
Frequently Asked Questions
How Often Should I Inspect Battery Terminals After Installation?
We inspect every 1–2 months after installation, checking connections for tightness and signs of terminal corrosion; if corrosion is present, we clean and reseal. This inspection frequency guarantees reliable starts and prevents electrical issues.
Can Lithium Batteries Be Jump-Started Like Lead-Acid Ones?
Yes, we can jump-start a lithium battery, but with cautions: jump-starting limitations exist, and we must respect compatibility considerations. We’ll explain clearly, step by step, and avoid risking damage while keeping you safely ahead of the current spike.
Do I Need a Separate Battery Management System for Bikes?
Yes, we need a separate BMS for motorcycles to manage balance and safety. We’ll verify compatibility with compatible chargers, ensure proper wiring, and monitor cell temps, preventing overdischarge. We’ll document setup steps and retention guidelines for reliability.
Will Lithium Batteries Affect My Motorcycle’s Warranty?
Yes, there are warranty implications to consider, and they vary by manufacturer. We’ll outline maintenance requirements and document installation steps, ensuring we stay within policy. We’re precise, methodical, and aim to protect your bike’s warranty.
Is a Portable Charger Compatible With All Lithium Chemistries?
A portable charger isn’t universally compatible with all lithium chemistries. We recommend checking the charger’s compatibility list and chemistry specifications before use, and avoid charging unfamiliar chemistries without manufacturer guidance to prevent damage or safety risks.
Conclusion
We’ve walked the line from selection to secure mounting, and yet you’ll trust a spark to decide your ride’s fate. Satire aside, follow the steps, respect torque, and monitor voltages like a hawk. If you hesitate, you’ll taste frustration and a dead bike, not coffee. So double-check polarity, clean contacts, and ECU break-in temps. With disciplined hands and meticulous checks, your lithium install becomes predictable power—no drama, just dependable starts and smooth rides.

